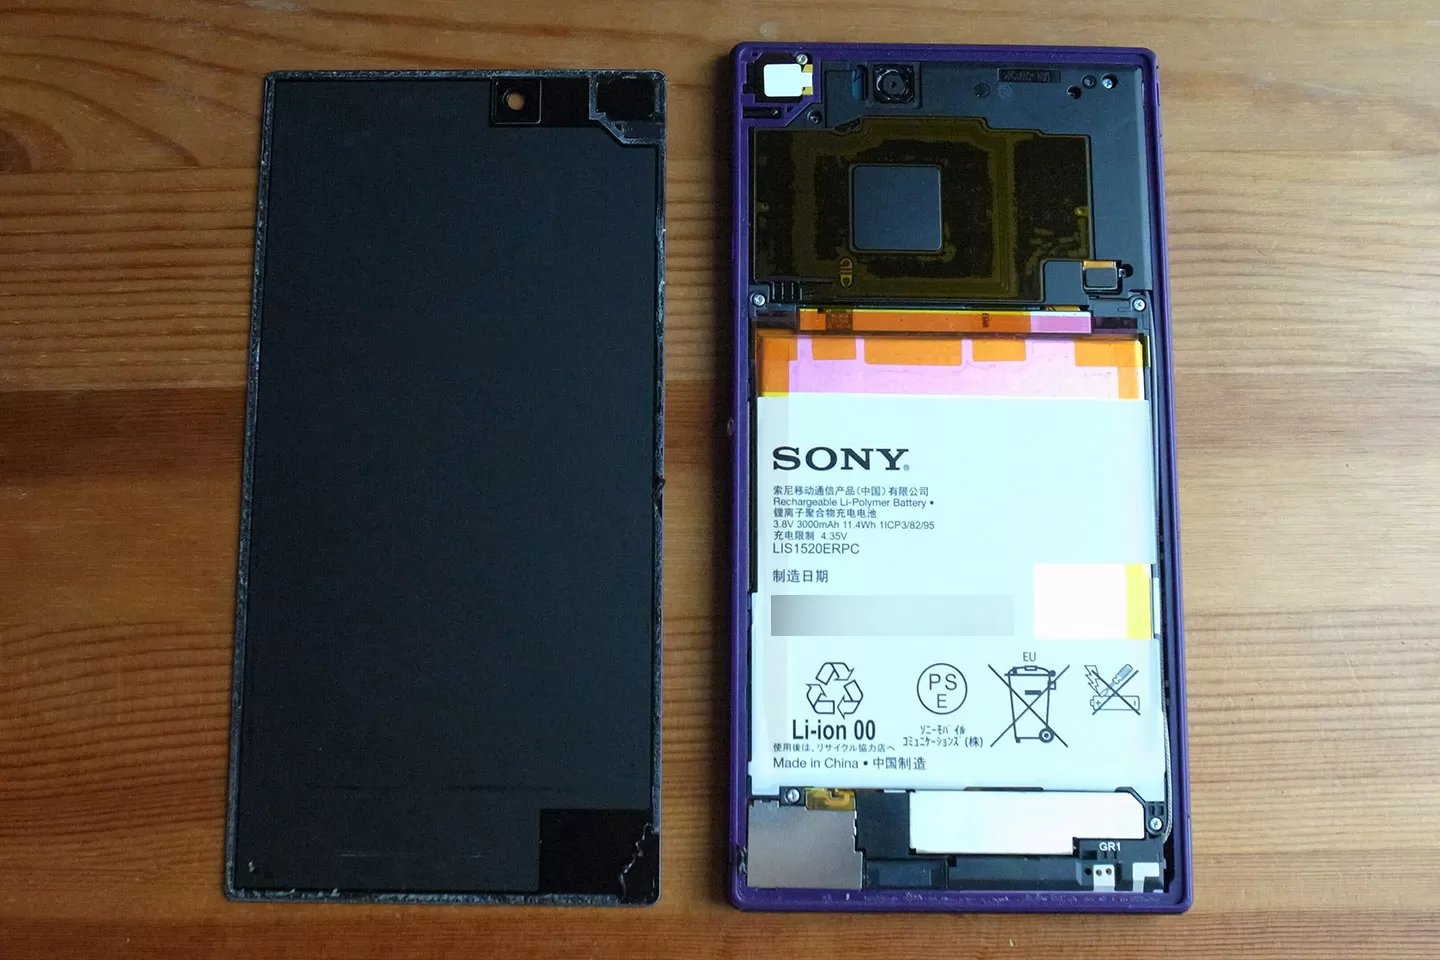
本日不幸にも文鎮化してしまったXperia Z Ultraさんですが、開腹手術により見事復活しました。めでたみ。
途中、手こずったりしたところがあったので、それも踏まえて手順をまとめます。
xdaに詳細な手順(英語)があります。
[GUIDE] Z Ultra and Z1 HARD BRICK RECOVERY | Sony Xperia Z Ultra | XDA Forums
これを見ながら進めましたよ。
目次
- 1. Download tools.7z from attachments and pack for your device.
- 2. Install ggsetup-3.0.0.7.exe
- 3. Open the back cover of your device.
- 4. Find the test point (See attachments).
- 5. Disconnect a battery, connect a usb cable. LED RED will start to blink.
- 6. Using the paper clip connect your test point with the GND. I used the metal shield in the middle of the motherboard.
- 7. Open the device manager, you should see SEMC Flash Device. If no, you did something wrong.
- 8. Disconnect your phone from computer.
- 9, Repeat the step 5.
- 10.Run the s1tool and select S1 MSM8974 EMERGENCY for the phone type.
- 11. Press the flash button, and choice the APP file for your device.
- 12. Press testpoint ready and repeat the step 6.
- 13. Remove the testpoint and press READY, when program will ask you to do so.
- 14. If flash was successful, you may disconnect your phone from usb, connect your battery and try to boot.You may have to charge your battery.
- 15. Now you can flash your device normally using software.
1. Download tools.7z from attachments and pack for your device.
まずは必要なファイルをダウンロードします。
ダウンロードしたら、解凍しておきましょう。
2. Install ggsetup-3.0.0.7.exe
Tools.7zを解凍した中にある「ggsetup-3.0.0.7.exe」を実行。ドライバがインストールされます。
3. Open the back cover of your device.
ここが第一の関門。Z Ultraの裏フタを外します。
ドライヤーであっためて両面テープの力を弱くして、吸盤で引っ張り、ピックとかを差し込んでこじ開けるイメージ。
— でこい (カリガリガリクソン) (@decoy284) 2015, 9月 27
こういうのがあると便利そうです。
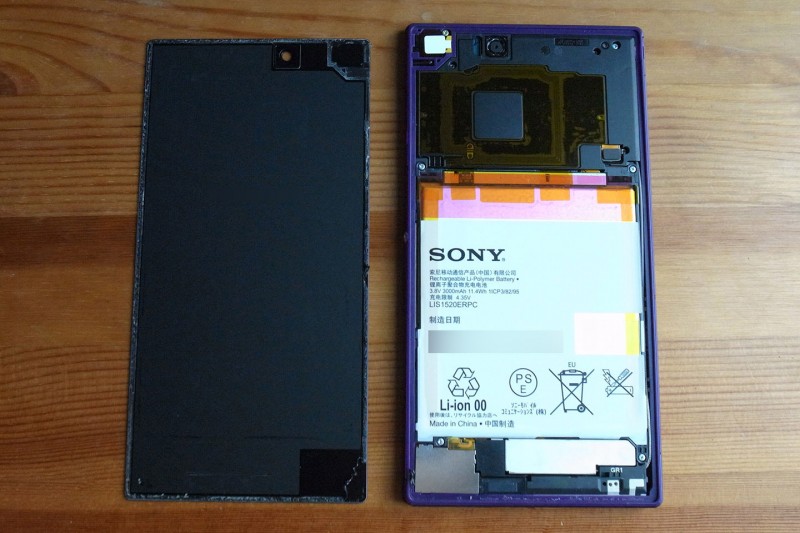
開腹できました。
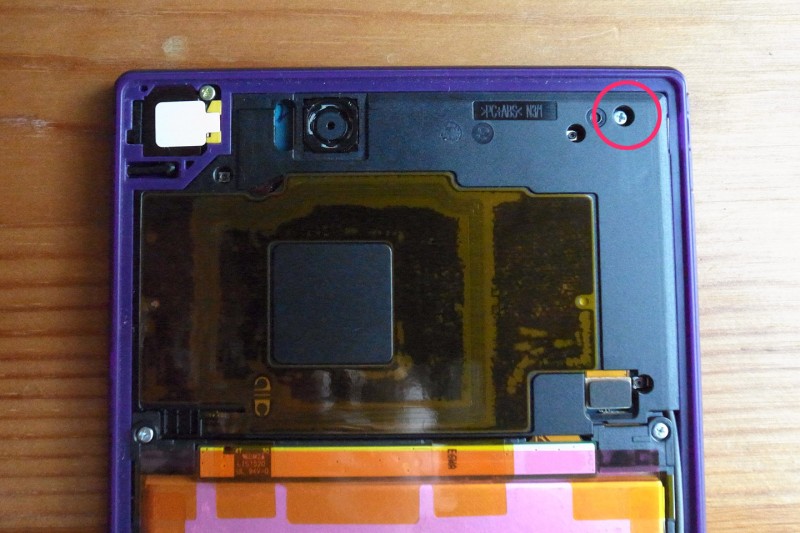
続いて、印つけてるとこのネジを外して黒いプラスチックのカバーをとります。
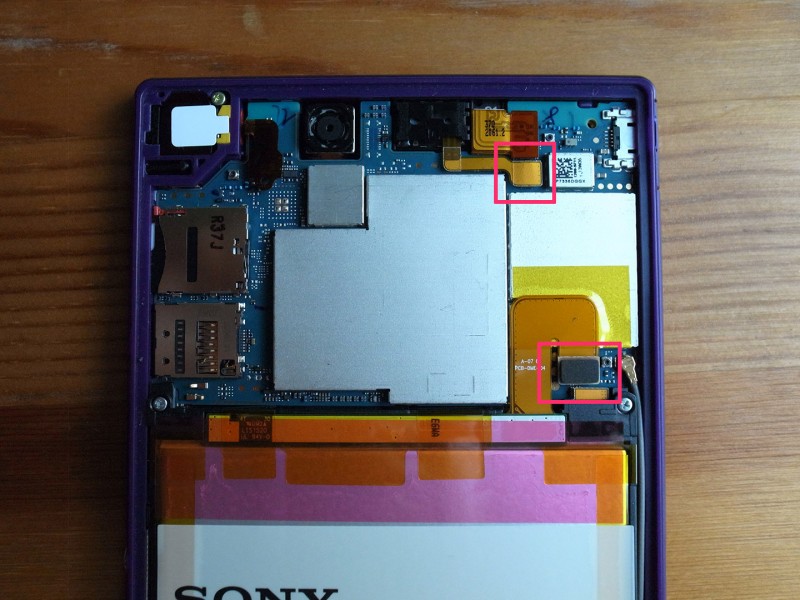
取れました。上のコネクタを外すとテストポイントが出てきます。ちなみに下はバッテリーコネクタ。あとから外す必要があるのでここで外しておきましょう。
なかなか開腹できないってひとは、いいハコ作ろうさんにコツが書いてあるので参考にしてみてください。
XPERIA Z ULTRAで重度な文鎮を開腹して回復 – いいハコ作ろう
4. Find the test point (See attachments).
一番右がテストポイントだよ!
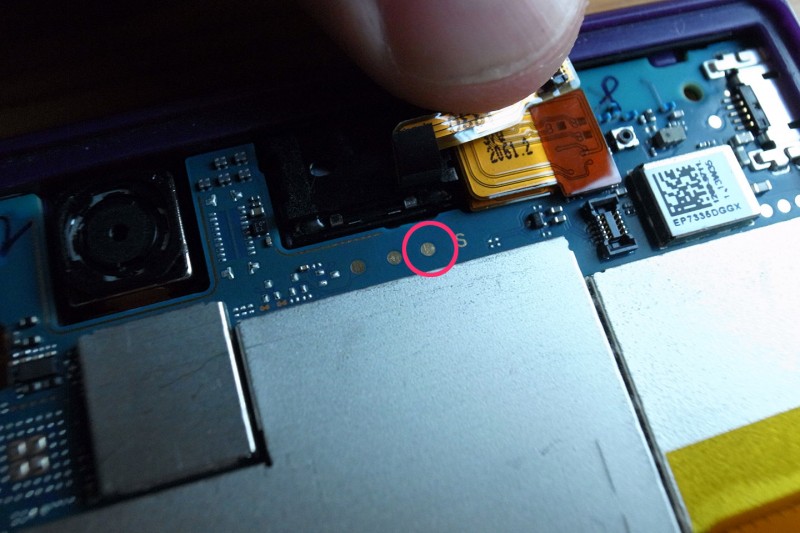
5. Disconnect a battery, connect a usb cable. LED RED will start to blink.
バッテリーコネクタが外れてることを確認したら、端末をPCに接続。この時、一瞬LEDが赤く点滅します。
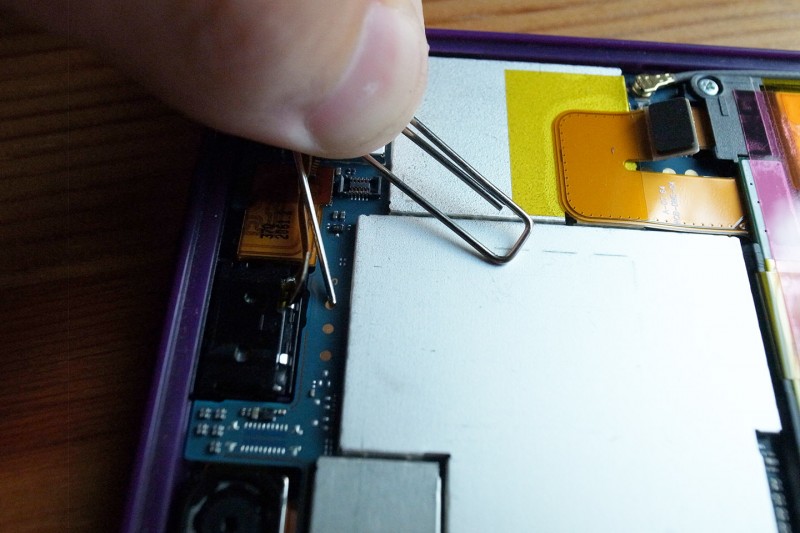
6. Using the paper clip connect your test point with the GND. I used the metal shield in the middle of the motherboard.
クリップなどで、テストポイントをGNDに接続。テストポイントのすぐ下の金属プレートに触れればOKです。
7. Open the device manager, you should see SEMC Flash Device. If no, you did something wrong.
デバイスマネージャを開き、ユニバーサルシリアルバスコントローラーに「SEMC Flash Device」があるかを確認。
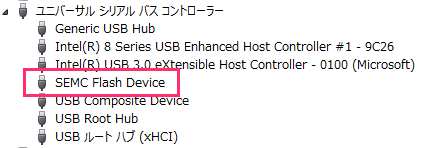
僕はここでかなり時間を使ってしまいました。最終的には、テストポイントとGNDをつないだ状態でPCに接続することで、ここが完了しました。
8. Disconnect your phone from computer.
一度ケーブルを抜いて接続を解除。
9, Repeat the step 5.
PCと接続とありますが、僕はこの手順でうまくいかなかったのでスルーします。
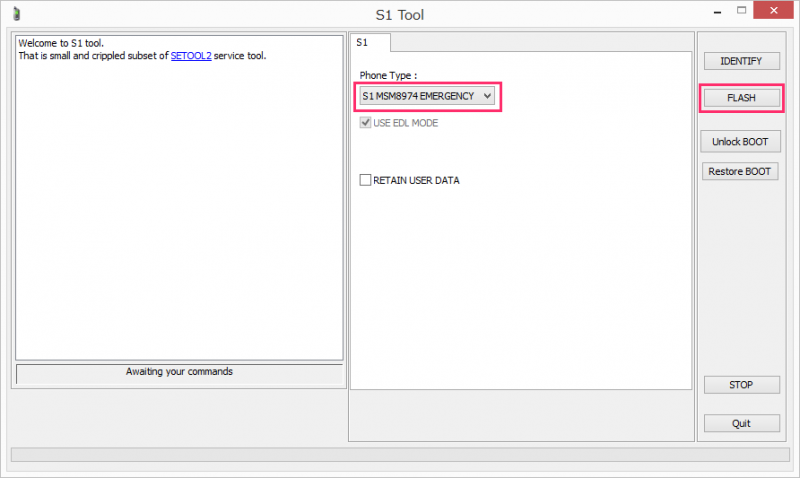
10.Run the s1tool and select S1 MSM8974 EMERGENCY for the phone type.
Tools.7zを解凍した中にある「s1tool.exe」を実行し、Phone Typeで「S1 MSM8974 EMERGENCY」を選択。
11. Press the flash button, and choice the APP file for your device.
続いて「FLASH」ボタンをクリックし、ファイル選択画面でC6806.zaの中の「14_2_A_0_290.APP_SW_Togari_GENERIC_1271_5715_S1_SW_LIVE_6732_PID1_0005_MMC.SIN_FILE_SET」を選択。
12. Press testpoint ready and repeat the step 6.
ここで、テストポイントとGNDをつなぎつつPCに接続し、「Testpoint READY」をクリック。
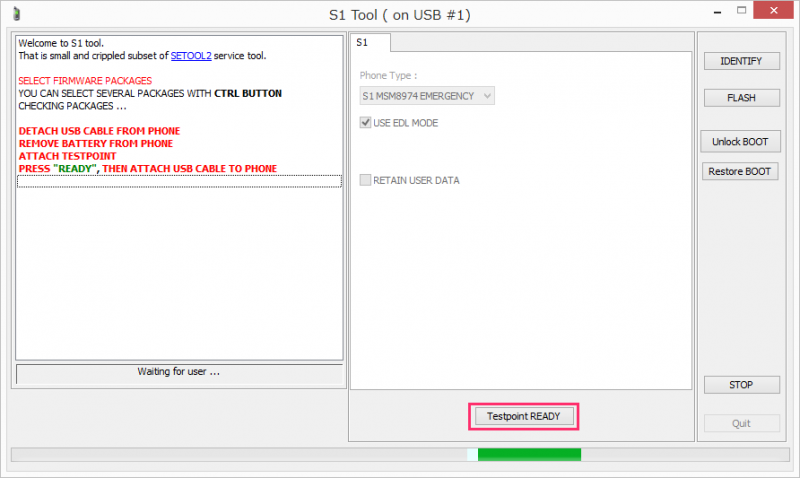
13. Remove the testpoint and press READY, when program will ask you to do so.
画面にテストポイントとGNDを離せってでるのでそれに従い、「Testpoint READY」をクリック。
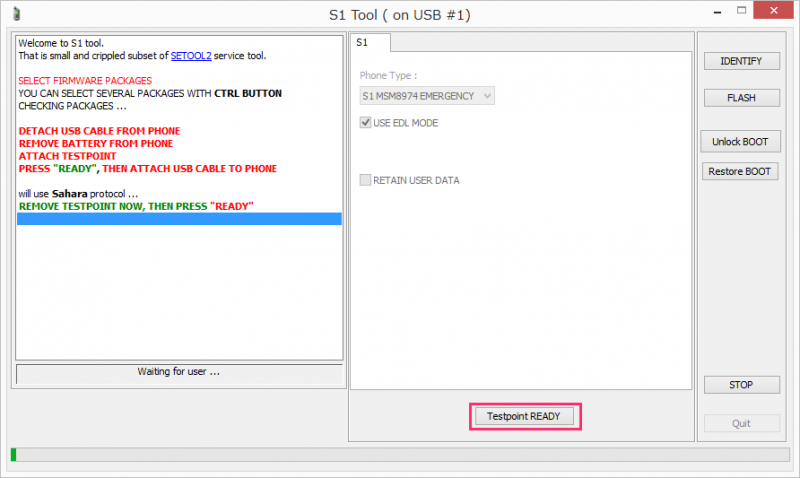
ここちょっと記憶が曖昧ですwもしかしたら、テストポイントとGNDをつなぎつつPCに接続した時点で、「REMOVE TESTPOINT」って出たかもしれません。
14. If flash was successful, you may disconnect your phone from usb, connect your battery and try to boot.You may have to charge your battery.
Flashが始まるので終わるのをじっくりまつ。
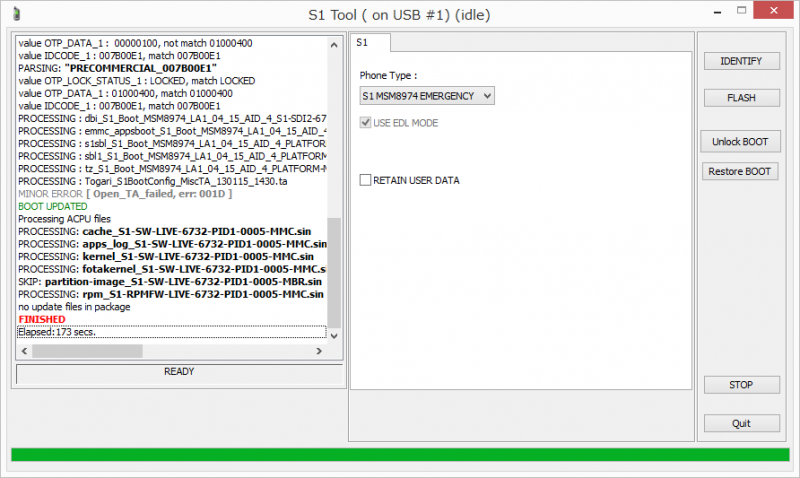
15. Now you can flash your device normally using software.
完了したら電源を投入してみましょう。この時点ではSONYロゴのところをループしますが、Flashtoolでftfを焼くことができるようになっています。
きたぞおおお!! pic.twitter.com/xAWMgycPyK
— でこい (カリガリガリクソン) (@decoy284) 2015, 9月 27
というわけで、なんとか復活させることができました。
これでようやくアプデできる…w
